You Betta Work: Enter the Web Worker

I’m one of those people that thinks JavaScript is fascinating and beautiful. I love typing prototype to add a method to an object. Just kidding. Seriously though, JavaScript can be implemented in the most fascinating ways. Through my web-development journey, I have come across this ‘web-worker’ guy several times. For those that are curious as me, I’ve done a bit of research and collected some interesting information about what exactly web-workers do and why you should care.

Fundamentals

Firstly, to understand what web-workers are doing, it’s important to understand what basic JavaScript running in your browser is doing. First point:

  • Javascript is embedded in your browser.

I’ll assume the reader has a bit of familiarity with JavaScript. It’s implemented in a browser to give functionality to a web page especially when static elements like CSS and HTML might need to be animated or interactive.

When Javascript is loaded on a page, it is actually placed into the HTML in a ‘<script>’ tag. If I use a script tag and label the source as another file in my assets, it will render the page with the JavaScript inside those brackets. Tangentially related, this embedded code is interpreted by the browser which then compiles the script in byte code. (Let’s avoid going down the wormhole of interpreted/compiled–it’s a bit of both, am I right?) The script that one sees in the source code of their page is handled as the main UI thread. This is the main execution process. It will register an on-click event. It has access to elements on the page and can make minor calculations. This brings us to the second point:

Limitations of the Main thread

This error message.

When your browser is running a script and the computation takes too long, it catches the error with this alert. The browser cannot tell the difference between a script that is in an infinite loop and one that is simply taking too long. A certain time interval is set as the threshold. Why don’t we just test the script to see if it is in an infinite loop? Oh wait–halting problem.

So, we have one main thread in the browser that can only run short calculations. But, say we want to render a 3D environment and simulate physics in that environment? That’s some heavy computation! What if I want to find a really big prime number?

Enter the web-worker

The web worker is a script that runs independent of the main thread’s event queue. It can handle large processes that would normally time out if they were run as a user interface script. With a web worker, I could make the aforementioned calculations independent of what events are going on in the window.

The way it works:

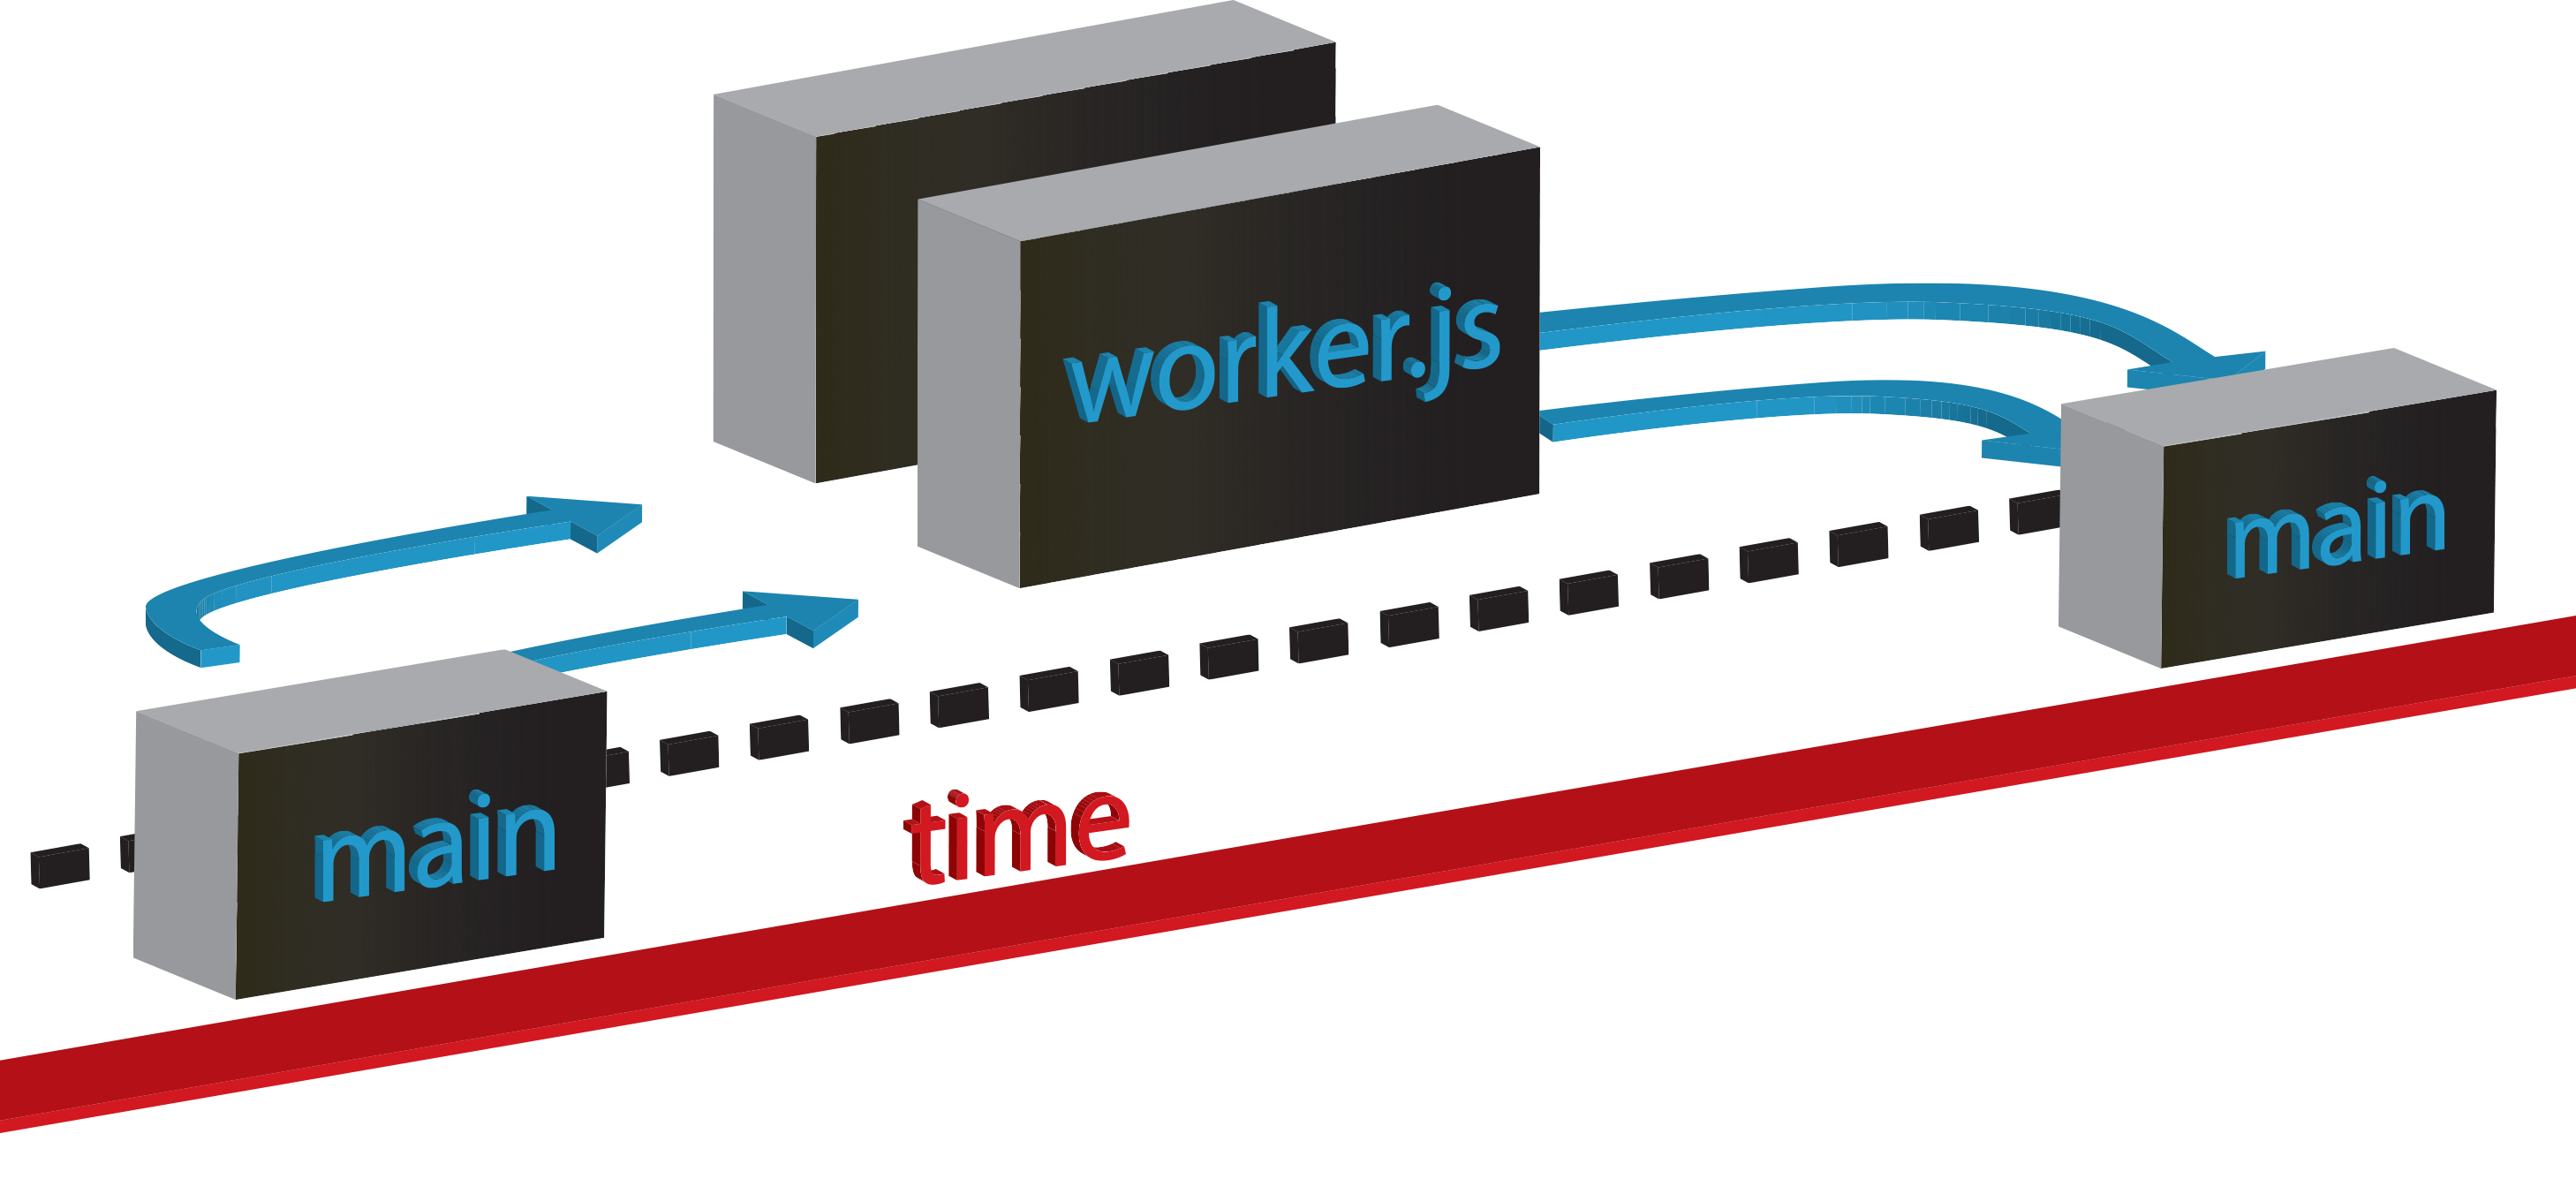
  • The main thread creates the web worker object as well as a web worker object to be sent input from main.
1
 var worker = new Worker('worker.js');
  • The main thread receives output from the web worker using ‘.onmessage’.
1
2
3
4
worker.onmessage = function(event) {
  console.log(event.data);
  // puts the output to the console whenever it is sent
}
  • The main thread sends input to the web worker through ‘.postMessage’.
1
2
3
function sendInput(input) {
  worker.postMessage(input);
}

In the main thread, we have to specify which worker we are sending the input and output to; however, the web worker need only say that it is receiving or sending information. This is because the worker is linked to its origin of creation. If I want the dedicated worker to send and receive information, I simply call the function postMessage() or onmessage().

To be specific, we are talking about dedicated web workers. They have a global scope that allows you to implicity call a MessagePort object with postMessage and onmessage. This is not the case for all web workers. A shared web worker has a SharedWorkerGlobalScope, which allows the worker to receive input from multiple sources through an ‘onconnect’ event. This functionality allows for separate windows in the browser to connect to the same web worker.

While workers allow us to run heavy computation independent of the event queue, there is a trade-off. If you try accessing DOM, window or parent objects from a worker, you will get undefined. Everything else is fair game. So, if you want heavy computation and window events, you have to interweave the workers and the main thread.

Get to Work!

I’m sure by now the reader gets a sense of what this tool could be used for. Thus far in my development journey, I have been using workers to simulate physics for a rendered 3D environment.

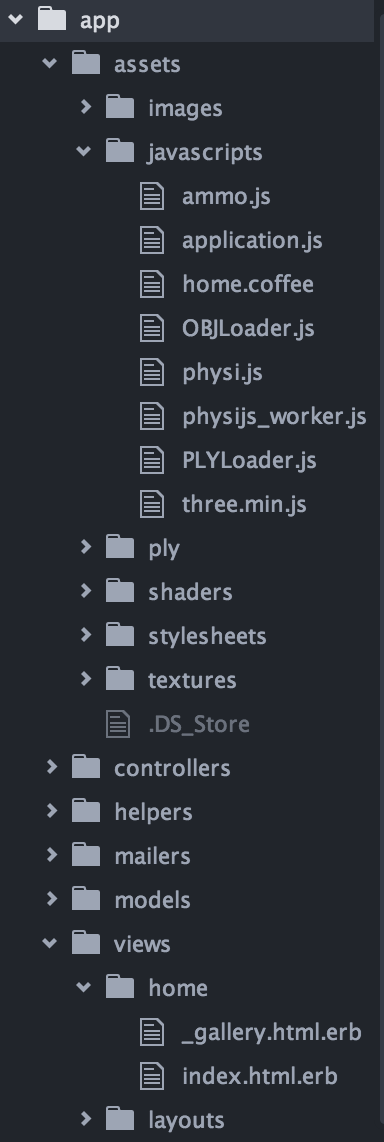
Physijs uses the physijs_worker to compute the physics of the scene which then posts the response back to the main thread. The formulas are actually written in ammo.js, a port from the C++ physics engine, bullet.

In physi.js, the main thread of the simulation, the worker is thus instantiated and immediately sets transferableMessage to be the postMessage function. TransferableMessage allows for sending an object completely across worker boundaries, neutralizing the original. Come back for another blog post on this functionality.

physi.js

1
2
3
4
5
6
7
this._worker = new Worker( Physijs.scripts.worker || 'physijs_worker.js' );
      this._worker.transferableMessage = this._worker.webkitPostMessage || this._worker.postMessage;

    // ...

    var ab = new ArrayBuffer( 1 );
      this._worker.transferableMessage( ab, [ab] );

The last two lines post the message to physijs_worker.js. Let’s take a look at what’s going on there.

physijs_worker.js

1
var transferableMessage = self.webkitPostMessage || self.postMessage;

Again, the script sets transferableMessage to be the function by which messages are sent back to the main thread. And later in the script, the worker sends back the same objects, updated with calculations.

1
2
var ab = new ArrayBuffer( 1 );
transferableMessage( ab, [ab] );

Sources

For further reading, check out these thorough resources on the subject:

On transferable objects:

Deploying to Heroku

Humble Beginnings

This has probably been one of the most frustrating problems I have had with the app thus far, and of course, it has to do with the sometimes-obnoxious, sometimes-amazing magic dance of ruby on rails. When Nick and I began this project, neither of us knew anything about rails. I fired up a rails app naively, expecting to just be able to write like a JS wizard. So, I downloaded all my files like a noob and put them in lib. I open up my index, and I see the rails default index.html.

Scratching my head in frustration for a day, I finally pushed the index page into the public folder, replacing the default index.html with my own. Finally, I could see my own content. But now that I was trying to put the THREE et al. library in the assets pipeline. Upon loading my index, nothing showed. Incredibly frustrating. I scoured stackoverflow and the rails documentation for a way to feed my assets to my index. Little did I know, the public index is not loaded with the same assets as the html files in views. I clearly did not understand MVC architecture and the way rails organizes its contents.

My temporary fix was cute. I moved the whole assets pipeline to the public directory of my app. The resulting directory tree looked like the directory on the left. Oh boy. It’s tough looking at that now. But it worked for the development phase.

Reorganizing

Now that I’ve worked on several apps, I’ve gotten my ish together. Although the function of the app is incredibly simple, making it work with rails requires specific knowledge about the asset pipeline. Knowing where to put files and how to call them in a view is not as simple as one might think.

Firstly, a home controller has to handle the root to index. That’s some basic stuff I didn’t know before learning rails at Flatiron. Then, the assets have to be moved over from the public/app/assets directory to the proper app/assets/ path. It gets very messy here. The asset pipeline is like that boss that’s easy to everyone else who plays the same video-game, and yet, I could never seem to beat him as a kid. I’m having PTSD flashbacks to playing Zelda as a kid. BUt this time, I’m not as ignorant. I know to add my requires in the application.js and application.css files; however, I spend a while figuring out that requiring the tree puts them in alphabetic order. That’s bad when their dependencies are not alphabetical!

Anyways, I sort my js and css files out. I have an applicaiton that is semi-functional. None of my ply objects or textures have loaded. In order to do that, I need to 1) factor my gallery.js out to a partial, 2) put an asset_path tag anywhere I’m loading a texture or ply object (omg my time is valuable tho), 3) configure the asset pipeline in my application.rb file.

Gotta' specify where things are for muh apps.

1
2
3
4
config.assets.enabled = true
  config.assets.paths << "#{Rails.root}/app/assets/textures"
  config.assets.paths << "#{Rails.root}/app/assets/ply"
  config.assets.paths << "#{Rails.root}/app/assets/shaders"

Web workers are a different thing. That’s more complicated. Email me if you want my solution for how I got my ammo.js and physjs_worker.js to precompile and get called in my gallery partial.

Deploying to Heroku

Can we not even? Just kidding. It wasn’t that bad. Sqlite is evil though. Don’t do it. Heroku and its finecky nature!

But seriously, a tip I have for anyone deploying a web app to heroku that has to precompile web workers:

Precompile on your own machine with:

1
rake assets:precompile

and then deploy.

Spend your free time playing with olives at martha-friedman.herokuapp.com.

A Bit of Boolean Logic and Its History

Understanding the fundamentals of computing is not only valuable for coding interviews. I would identify myself as someone who believes in this axiom: history helps us better understand the present. I’m particularly interested in how the machine processes information at the most fundamental level. Society is generally aware that our machines process information as a series of 0s and 1s, but how exactly does that work?

The story of the 0s and 1s begins, for our intents and purposes, at MIT’s graduate school. Claude Shannon, who is famous for his later founding of information theory, wrote a masters thesis applying the slightly obscure Boolean algebra to the problem of telephone relays. For much of the 20th century, routing telephone calls was an incredibly costly operation. His thesis, A Symbolic Analysis of Relay Switching Circuits, showed that boolean algebra could simplify the system of relays that were currently in place as well as the converse–that relays could be arranged to solve problems in boolean algebra. This assertion made clear the relationship between circuits and logic gates.

We all know that a boolean is either 1 or 0, so boolean algebra is the set of operations that can be performed on a boolean. In every computer, circuits are a physical manifestation of the logic of booleans. This is the most basic logic that allows a program to run, for the computer to be booted–for anything to work digitally. These are its first order operations:

AND, OR, and NOT

AND is a conjunction. If and only if both booleans are true, then their conjunction is also true. We represent this in our higher-level programming languages (like Ruby and JavaScript) as A && B.

OR is a disjunction. If either boolean is true, then their disjunction is true. If both are false, then their disjunction is false. A || B in our terms.

NOT is a negation. If a boolean is true, it’s negation is false and vice versa. And as you might expect, !A.

Now, what interests me most about boolean logic is that the combination of these three basic functions produces all of the operations we could possibly want to do on any bit of information.

For example, a NOR is a combination of negation and disjunction. It is true if neither boolean is true. It would look something like !(A || B).

By now, we can deduce what NAND might look like: !(A && B).

There are many ways of representing these operations, and perhaps one of the most clear ways is a truth table. Because operations can be strung together to make even more complicated operations, these tables can end up having many columns. Here’s a rather simple truth table:

And here’s a truth table for a multiplexer. A multiplexer selects a signal based on the value of the selector, s. Muxes are everywhere. They are in your CPU, graphics card. The output of a Mux is Demuxed on the other end. Multiplexers allow an engineer to send multiple different signals over the same channel by selecting them at different times. Otherwise, a bunch of channels would be necessary. What’s the obvious application for this? A telephone network–the original problem that Shannon exposed to boolean algebra.

Modular Code for Modular Works of Art

    A key feature of Martha Friedman’s work is its modularity. Although you won’t see people rearranging parts of pieces in the gallery, the human-scale sculptures appear composed of individual objects that are strung through poles or resting on boxes. The digital gallery, however, allows the user to enter an interactive fantasy in which the heavy and delicate pieces can be removed and reaffixed to other supports.

    Allowing the user to separate objects and rearrange them in a sensible way is an integral part of creating an impactful user experience. Otherwise, a perfectly rendered scene would harly differentiate itself from a photograph, which, along with text, is the artist’s medium of choice for representing their artwork. Thus, a logical implementation of cohesion would elevate the gallery in its uniqueness and specificity to the artist’s work.

    The logic of this mechanic should follow the physical architecture of the sculpture. However it’s made in real life should be reflected in the digital environment. Olive Totem (2011) has a cement cube base with a pole perpendicular to the ground. Rubber pimento-stuffed olives are placed at the top of the pole and slid down into place. In the world of computers, we call this a stack. A stack is a collection in which the last added element is the first one removed. Adding to a stack is calling pushing; removing, popping. If one wants to remove a digital olive from the digital armature, it has to be popped from an array of olives where the last olive is the highest on the totem.

    Stacks allow us to conceptualize how the problem might begin to be solved; however, none of the libraries used in this project provide an immediately useable solution to solving this problem. And after hacking away at this problem with my collaborator for a week or so, we discovered that our phsyics engine doesn’t support porous meshes. That is– an olive can’t simply have a hole in it and be strung onto the sculpture as in real life. The mechanics of olive stacking must be incorporated in the physics of the environment.

    Because we’ve already identified this arrangement of pieces as a stack, we know that the mechanics of sculpting will revolve around popping and pushing from an array. There are two majorly important pieces of data in this situation: the array of olives and the armature onto which the olives are “snapped”. Anyone who knows adobe products well should be familiar with snapping. Snapping is the sometimes-annoying function that moves an object to a specific position when it comes within a certain range of that position. Snapping is how the olives transition between being free objects and anchored to an armature. However, not just any object can be snapped on and off. Only the last object in the array is poppable. Upon initialization this object is pushed to the moveable_objects array, and when it is popped, the next olive is added to the moveable_objects array. The following code is the result of marrying this logic with the environment variables (mouse clicks), 3D models and physics engine.

    At the top of my gallery.js, I declared the armature, intersect_cylinder, olives array, and slected_thing as global variables so that they can be accessed by the eventhandlers, the functions that handle user input.

1
var armature, intersect_cylinder, olives = [], selected_thing;

    When the mouse clicks an object (selected_thing), this bit of code is run. Here, it should unsnap an object if it the selected_thing is the last object in the olives array.

1
2
3
4
5
6
if (selected_thing == olives[olives.length-1]) {
    olives.pop();
    // only makes next olive moveable if it exists
    if (olives.length !== 0)
  moveable_objects.push(olives[olives.length-1]);
}

When the mouse is unclicked, this bit of code is run:

1
2
3
4
5
6
7
8
9
10
11
12
13
14
15
16
17
18
19
20
21
22
23
24
25
26
27
28
29
30
31
32
33
34
35
36
37
38
39
40
41
42
43
44
45
46
47
48
49
//retrieves coordinates of the mouse click
_vector.set((evt.clientX / window.innerWidth) * 2 - 1,
      -(evt.clientY / window.innerHeight ) * 2 + 1,
      1);

//a raycaster returns whatever intersects with the 3D line
//drawn from the camera through the mouse click on the near frustum
raycaster.setFromCamera(_vector, camera);
var collisionResults = raycaster.intersectObjects( [intersect_cylinder, armature].concat(olives) );

//if the mouse unclicks on any bit of the sculpture,
//the snapping function begins
if ( collisionResults.length !== 0) {
    if (olives.length == 0) {
  var snap_y = -11 + selected_thing.geometry.boundingSphere.radius;      
    }
    else {
  var snap_y = olives[olives.length-1].position.y
      + olives[olives.length-1].geometry.boundingBox.max.x
      + selected_thing.geometry.boundingBox.max.x;
    }

    selected_thing.__dirtyPosition = true;

    //put object in position
    selected_thing.position.x=armature.position.x;
    selected_thing.position.y=snap_y;
    selected_thing.position.z=armature.position.z;


    //make object static
    var _v3 = new THREE.Vector3(0,0,0);
    selected_thing.setAngularFactor(_v3);
    selected_thing.setLinearFactor(_v3);
    selected_thing.setLinearVelocity(_v3);

    //make last object on olive totem moveable
    var last_index = moveable_objects.indexOf(olives[olives.length-1]);
    moveable_objects.splice(last_index,1);
    if (moveable_objects.indexOf(selected_thing) == null) {
  moveable_objects.push(selected_thing);
  // avoids creating duplicates if the object is already in the moveable objects array
    }

    //finally, push selected_thing on the olives stack
    olives.push(selected_thing);


}

And with a lot of debugging, it works like a charm.

    After playing around a bit in the console, adding new sculptures wherever I saw fit, I discovered a rather annoying problem. When I add another sculpture that has the armature/olive stack feature, I have to duplicate the code above. This code is not designed to scale with new sculptures being added, dynamically or not. Slightly restructuring the logic of this feature will improve the performance of the gallery and its potential for further development. It simply requires refactoring the olives and armature into an object that is then added to an array of globally accessible sculptures.

The resulting global variables are then simply:

1
var selected_thing, sculptures = [];

And the sculpture object looks something like:

1
2
3
4
5
var Sculpture = function(armature,modules) {
    this.armature = armature;
    this.modules = modules;
    sculptures.push(this);
};

Which means that everything in the snapping function has to be changed accordingly.

Snapping off:

1
2
3
4
5
6
7
8
9
10
for (i = 0; i < sculptures.length; i++) {
    if (selected_thing == sculptures[i].modules[sculptures[i].modules.length-1]) {
  sculptures[i].modules.pop();
  // only makes next olive moveable if it exists
  if (sculptures[i].modules.length !== 0)
      moveable_objects.push(sculptures[i].modules[sculptures[i].modules.length-1]);
  break;
    }

}

And the snapping to:

1
2
3
4
5
6
7
8
9
10
11
12
13
14
15
16
17
18
19
20
21
22
23
24
25
26
27
28
29
30
31
32
33
34
35
36
37
38
39
40
41
42
43
44
45
46
47
48
49
50
51
52
53
54
55
56
57
58
59
60
var sculpture;
var collisionResults;

_vector.set((evt.clientX / window.innerWidth) * 2 - 1,
      -(evt.clientY / window.innerHeight ) * 2 + 1,
      1);

raycaster.setFromCamera(_vector, camera);

//iterates through sculpture objects
for (i = 0; i < sculptures.length; i++) {
    collisionResults = raycaster.intersectObjects(sculptures[i].modules.concat(sculptures[i].armature));
    if (collisionResults.length !== 0) {
  sculpture = sculptures[i];
  break;
    }
}


if ( collisionResults.length !== 0) {
    if (sculpture.modules.length == 0) {
  var snap_y = -11 + selected_thing.geometry.boundingSphere.radius;
    }
    else {
  var snap_y = sculpture.modules[sculpture.modules.length-1].position.y
      + sculpture.modules[sculpture.modules.length-1].geometry.boundingBox.max.x
      + selected_thing.geometry.boundingBox.max.x;
    }

    selected_thing.__dirtyPosition = true;

    //put object in position
    selected_thing.position.x=sculpture.armature.position.x;
    selected_thing.position.y=snap_y;
    selected_thing.position.z=sculpture.armature.position.z;


    //make object static
    var _v3 = new THREE.Vector3(0,0,0);
    selected_thing.setAngularFactor(_v3);
    selected_thing.setLinearFactor(_v3);
    selected_thing.setLinearVelocity(_v3);

    //make last object on sculpture stack moveable
    var last_index = moveable_objects.indexOf(sculpture.modules[sculpture.modules.length-1]);
    moveable_objects.splice(last_index,1);
    if (moveable_objects.indexOf(selected_thing) == null) {
  moveable_objects.push(selected_thing);
  // avoids creating duplicates if the object is already in the moveable objects array
    }

    //finally, push selected_thing on the sculpture stack
    sculpture.modules.push(selected_thing);


}
//end snapping

selected_thing = null;
}

    Because I’ve now folded the armature and olives into an object, I can further refactor the code to include logic specific to the piece. Moving forward, I plan to include new mechanics beyond stacking and animating the snapping and desnapping so as to enhance the user’s experience.

    Also, those damn olives need to be properly modeled.

Perspective

    There’s a lot of mystification around the painted image. Many have admitted they couldn’t make great works of art because they weren’t born with the natural skill to render the natural world. Everytime we attribute great work in the arts to this mysterious genius-quotient, we are overlooking how art is created by means of technology, owing itself to more than simply the hands of a cinquecento master.

    Paul Graham is particularly guilty of this in his essay “Hackers and Painters”. While attempting to praise the work of Leonardo DaVinci, he condescendingly puts emphasis on the painstaking work of painting every leaf in a bush. In fact, if we are to go along with Graham’s comparison, almost anything could be substituted for painting. A hero figure works hard and paves the way for more people to do what he does. This argument is not specific and you shouldn’t care about it. By allowing his audience to be mystified at DaVinci’s genius, Graham avoids discussing what exactly makes oil painting significant.

    There is a non-trivial relationship between Western oil painting and computing, and its love-child is 3D graphics. Let’s talk a bit about painting. In the 15th century, Filippo Brunelleschi sketched the Florentine skyline on a mirror. By extending the lines of the buildings, he discovered that they were in fact perspectival orthogonals that converged on a vanishing point. This discovery began the widespread use of perspective on the Italian penninsula and, eventually, the rest of Europe. Others had guessed at perspective, and some were disinterested. However, Brunelleschi’s discovery was significant because it revealed the geometric relationship of things in space to our perception of them. Whether beautiful or devotional, this method served to create an image that mimicked perception rather than coding objects' relationships symbolically.

    Brunelleschi was not gifted with the ability to perfectly draw a skyline. Optical devices allowed him to separate the world that he perceived from its planar representation. Rather than having to paint everything outside his window, he could isolate that image to a flat surface. This is technology used interestingly. This is a hack. In 2002, artist David Hockney and physicist Charles M. Falco published a treatise on their theory that the photographic realism achieved by renaissance art is the result of optical technology: camera obscuras, camera lucidas, curved mirrors. Furthermore, artists like Giotto were calculating the orthogonals using rudimentary algebra.

    Painters used technology to discover the transformation of a three-dimensional space into a two-dimensional image as perceived from a position defined in that space. Computer graphics use a very similar understanding of perspective to project a scene. A projection is a flattening of three-dimensional coordinates such that they can be presented on a two-dimensional surface. When we play video-games or work in CAD, we are experiencing the graphics engine rendering the scene by transforming a matrix of 3D coordinates into 2D coordinates. Oil painting happens at 50 frames per second.

    In order for us to program this into the computer, we have to define this operation mathematically such that it is iterable. This is done through matrix multiplication. The graphic below demonstrates how the transformation matrix can be divided up into different operations on coordinates that follow the same rules.

    I’ve begun to think a lot more about perspective since working with WebGL through Three.js. I had the issue of trying to create a ray that would intersect with objects on a field, allowing me to select those objects and move them with my cursor. This is a somewhat complex operation that is heavily simplified in the Three.js library.

    When we click a screen, our computer doesn’t intuit where in three-dimensional space where that click lands. The click corresponds to x- and y-coordinates. These clicks have to be extended into space using a ray-caster.

gallery.js

1
var raycaster = new THREE.Raycaster(camera, 3d_vector);

Three.js

1
2
3
4
5
6
7
8
9
10
11
12
13
14
THREE.Raycaster = function ( origin, direction, near, far ) {

        this.ray = new THREE.Ray( origin, direction );
        // direction is assumed to be normalized (for accurate distance
        this.near = near || 0;
        this.far = far || Infinity;

        this.params = {
                Sprite: {},
                Mesh: {},
                PointCloud: { threshold: 1 },
                LOD: {},
        };
};

    This raycaster object is set with the coordinates of the camera and a three-dimensional vector that is constructed from the mouse-click. The mouse-click’s z-coordinate is set to 1, the near frustum, thus the mouse is told that it intersects with the frame of the screen as a plane in the 3D environment. When we ask the raycaster what it intersects with in the scene,it creates a line of spheres extending into the scene along this line and checks if those spheres intersect with the coordinates of any of the objects. This is an extremely basic explanation of hundreds of lines of code. Nonetheless, the logic of it can be understood. Three.js gets around the problem of unprojecting a vector by drawing a three-dimensional line between two points.

Project Updates

BASH Shell Scripts

    Over the last few weeks, I’ve been working on a few projects with varying motivations and goals. Before I started at Flatiron, I began using a text editor called emacs as per the advice of a friend who works on OpenBSD. The editor is daunting at first. The learning curve is enormous. After using it for an hour, I wondered why anyone would bother; however, having used it for three and a half weeks, my efficiency in writing code has gone up significantly.

    While the program is extremely difficult to learn, memorizing the key-commands results in your hands never having to leave the home position. No more shifting your hands from the keyboard to the mouse to click an area of text. Further, the editor can be customized to reduce the number of times one klicks the keyboard. Becoming more efficient at using the computer is like a drug. Since starting at Flatiron, I’ve been seeking ways to speed up the lab-completion process, so I can spend more time reviewing and refactoring code.

    So, naturally, I started writing some basic shell scripts. When bash loads, it loads a file called ~/.bash_profile where one can write new shortcuts like “subl” to open sublime or “ll” to shorten “ls -lah”. When we start and end a lab, there’s a series of bash commands we all use in succession. They are best condensed and shortened to one command. So, with a bit of research, I set out to write two short scripts.

    The first one clones a repository and then changes to the directory that it created.

~/.bash_bin/gitclonecd.sh

1
2
3
4
5
6
7
8
string=$1
git clone $string

string=${string#*/}
string=${string%.*}

cd ${string}
echo "cloned and moved into directory ${string)"

    However, if I wanted to use this script, I would have to type the file name and path in terminal. I needed to also write an alias in my .bash_profile file that would automatically call the script and feed it the command-line argument.

~/.bash_profile

1
2
alias gitf=". ~/.bash_bin/gitaddcommitpush.sh"
alias gits=". ~/.bash_bin/gitclonecd.sh"

    The second alias refers to the script pasted above. The first alias refers to the first script I made. This one handles adding, committing, pushing and changing to the above directory.

~/.bash_bin/gitaddcommitpush.sh

1
2
3
4
5
6
7
8
string=$@

git add .
git commit -m "${string}"
git push origin master
hub browse
cd ..
echo "Pushed to Github with message ${string}."

    There are some non-ideal elements to these scripts. For one, the $string variable only takes one command-line argument. Arguments in bash are separated by white space. I can effectively only push a commit with one word. Luckily, that suffices for labs. I fixed this problem using $@ and interpolating the variable on line 3. $@ returns all command line arguments in one variable. Secondly, the command-line argument in the first shell script–the url for the remote repository–is reduced to a substring in a very inelegant way. Instead of being returned with regex, it is hardcoded with the index of the string. If anyone wants to use this script, they will have to change lines 3 and 4 to reflect their own account’s url. As I learn more bash shell script language, I plan to improve this code. This was improved with the use of some “shell built-ins”. The code in gitclonecd.sh extracts everything left of “.” and everything right of “/” returning the name of the directory that had already been cloned.

An Artist’s Website

    Several months ago, a friend of mine who makes large, beautiful and oddly sexual sculptures was talking to me about artist websites. She regretted she didn’t have one but acknowledged that her vision would cost a significant amount of money to build. Her idea was to have a website where one could pull about the modules of her pieces, which would allow the digital viewer to recombine the pieces in order to create new sculptures. At the time, I had only a bit of experience with building websites, having worked on my own with HTML, CSS and very basic JS.

    A few months later, a friend of mine was working on an interactive web game with the javascript library, THREE.js. THREE allows someone with slightly-more-than-basic understanding of javascript to model and render three-dimensional objects in a web browser. While browsing the examples of THREE, a page using a second library, Physi.js, an interactive Jenga game caught my attention. The blocks were beautifully rendered. One could pull out a block, and the tower would collapse rather realistically.

    It took me another few months to make the connection. I could build this sculptor’s website using these two libraries, giving her exactly what she was looking for. In the end, I would get a fulfilling web graphics project with my name on an influential artist’s website. So, I pitched her the idea with my friend, and she was elated.

    Last week, I began writing the code that would sketch out the basic environment of the web gallery. Here’s a snippet of code to illustrate how the libraries work.

marthafriedman/public/app/assets/javascripts/gallery.js

1
2
3
4
5
6
7
8
9
10
11
12
box = new Physijs.BoxMesh(
new THREE.BoxGeometry( 10, 10, 10 ),
new THREE.MeshLambertMaterial({ color: 0xFF66FF }),
    .4,
.4

);
box.position.y=20;
box.castShadow = true;
box.receiveShadow = true;
scene.add( box );
moveable_objects.push( box ); //add box to the array of shit that can be moved

    Line one declares a new Physijs object with four different arguments. The first argument gives the object a shape; the second gives the object a mesh that reacts to light and has a color (in this case, pink), the third and fourth correspond to the object’s friction and restitution. The last line adds the box to an array of things that can eventually be clicked. That bit of code is dealt with later in the gallery.js file and is currently giving me a headache. But, it’s all part of the process.

Here’s a progress pics, because–well–pics or it didn’t happen.

PILOT

It’s here–the blog that few have sought and even fewer have found.